Last updated 24 July 2026
My journey into the leather industry wasn't as rosy as I'd envisioned. What began as a hobby turned into learning on the job, every day, from the workmanship to the quality of the leather itself. And as an amateur at the time, not knowing the standard terms of the trade was a genuine setback. People used words at me that I nodded along to and looked up afterwards.
A thousand-odd products later, I've learned most of them the slow way. This is that vocabulary in one place — 81 terms, from the raw hide through the tannery to the way a wallet darkens in your pocket after three years.
I've organised it the way leather actually happens rather than alphabetically, because the terms make far more sense in sequence. Tanning explains why chrome-tanned leather is soft. Splitting explains why "genuine leather" is a warning rather than a promise. Read it start to finish and it's a short course in how leather is made. If you just need one word, the A–Z index below jumps straight to it.
A word on why this matters if you're shopping rather than studying. Most of the confusion in leather is deliberate. There are terms designed to sound like quality while describing its absence, and the gap between "full-grain" and "genuine leather" is thousands of hours of wear. You don't need to become an expert. You need about six of these terms, and you'll spot the difference on a shelf from then on.
Where it's relevant, I've said what we use in our own workshop and why — and where a term describes something we deliberately avoid, I've said that too.
Table of Contents
Every Term, A–Z
- Altered Leather
- Alum Leather
- Aniline Dye
- Aniline Leather
- Antique Leather
- Base Coat
- Bating
- Blue Split Leather
- Blues In The Leather
- Boarding
- Boardy
- Bonded Leather
- Break
- Breathability
- Brushed Leather
- Buffed Leather
- Chrome Tanned Leather
- Chrome Tanning
- Chromium Salts
- Corrected Grain Leather
- Cowhide Leather
- Crust Leather
- Curing
- Deerskin Leather
- Degrained Leather
- Drawn Grain
- Drum Dyeing
- Embossed Leather
- Enhanced Grain
- Exotic Leather
- Fat Wrinkles
- Full Grain Leather
- Full Hand
- Glazed Leather
- Grain (Character)
- Grain (Leather)
- Grained Leather
- Hair-on Hide Leather
- Hand
- Hand Rubbing
- Hide
- Imitation Leather
- Laminated Leather
- Leather
- Leather Finish
- Leather Hide Parts
- Leather Production
- Leather Weight and Thickness
- Liming
- Matte Finish
- Milling
- Naked Leather
- Natural Grain
- Nubuck Leather
- Patent Finish
- Patent Leather
- Patina
- Pearlized Leather
- Perforated Leather
- Pigmented Leather
- Pleather
- PU Leather
- Rawhide
- Re-Tanned Leather
- Semi-Aniline Leather
- Shrunken Grain Leather
- Skive
- Split Grain Leather
- Suede Finish
- Synthetic Tanning
- Table Run
- Tanning
- Tawing
- Trimming
- Unfinished Leather
- Unprotected Leather
- Vegetable Tanned Leather
- Vegetable Tanning
- Wet Blue Leather
- Whole Hide Leather
- Yield
The Hide
Leather Weight and Thickness
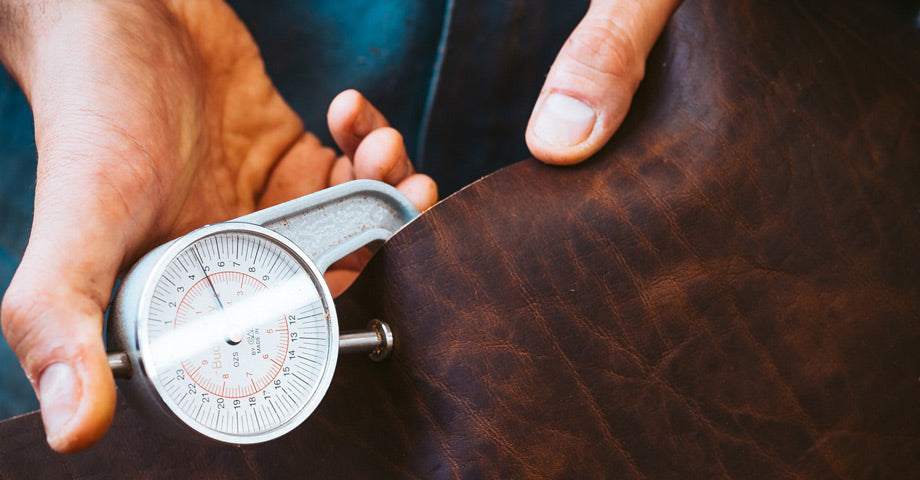
Leather is sold by weight, but the weight is really a thickness. A hide described as 9oz does not weigh nine ounces — the figure describes how thick it is, and the convention is old enough that it has outlived the logic behind it.
The working rule is that one ounce equals roughly 1/64 of an inch, or about 0.4mm. So 9oz leather is somewhere near 9/64 of an inch, a little over 3.5mm. Because hides are not machined to a uniform gauge, weights are almost always quoted as a range — 8–9oz, 5–6oz — and a tannery that quotes a single number is rounding.
Two other units survive. Irons come from shoemaking, where cobblers measured soles against physical iron plates of known thickness. Millimetres are what most of the world outside North America uses, and they have the considerable advantage of meaning what they say.
Thickness is the single most useful spec to ask for, because it predicts behaviour better than any adjective. Under about 3oz leather is garment weight and will drape. Around 4–5oz suits wallets and linings — thick enough to last, thin enough to fold without bulk. From 8oz up you are in belt, holster and strap territory, where the leather has to carry load without stretching. A belt cut from 5oz stock will stretch and curl within a year no matter how good the hide was. It is also the spec most often left off a product page entirely, and its absence usually tells you something — a maker cutting thick stock has every reason to say so.
What we use: belts are cut from 9oz full-grain leather. See the belts.
Cowhide Leather

Cowhide is the skin of cattle, tanned into leather. It accounts for something close to seventy percent of world hide production, which makes it the default material behind the unqualified word "leather" on almost any product tag.
Its dominance is a by-product of the meat industry rather than a judgement about quality — the hides exist in enormous numbers regardless, which keeps them among the cheapest available. That volume is also why cowhide sets the standard everyone else is measured against.
What recommends it is size and structure. A single hide runs roughly 40 to 60 square feet, so large panels can be cut without seaming. The fibre structure is dense and strongly interwoven, which is where the durability comes from, and it is thick enough that it usually gets split into layers before use. It takes any finish you care to put on it — aniline, pigmented, embossed, hair-on.
Age matters more than most buyers realise. Calfskin from a young animal is finer-grained, softer and more uniform, and priced well above hide from a mature cow. Older animals give thicker, coarser, more heavily marked leather — better for a belt or a saddle, worse for a wallet interior or a glove.
Related terms worth knowing: whole hide, a side (half a hide, cut down the backbone), and a shoulder or bend, which name the region of the animal the piece came from. Those region names matter more than they sound — the bend, along the back, is the firmest and most consistent part of the hide, while the belly is stretchy and loose. Two products cut from the same hide can behave quite differently depending on where on the animal they came from.
Leather — Animal hide or skin preserved by tanning so it will not rot. Probably the first material humans ever made, and still the only one that improves with use rather than merely surviving it.
Leather Production — The full sequence from raw hide to finished material: curing, soaking, liming, bating, tanning, splitting, dyeing and finishing. Most of the character of the end result is decided in the tannery, not the workshop.
Exotic Leather — Two different things under one label: leather from unusual parts of common animals, such as cow belly, and leather from rare species. Both command a premium, and the second raises questions worth asking about the source.
Hair-on Hide Leather — Hide tanned with the hair left on, so the coat becomes the surface. Used for rugs, bags and cushions. It cannot be cleaned the way finished leather can, and the hair sheds where it is rubbed.
Deerskin Leather — Soft, stretchy leather from deer hide, traditionally smoke-tanned by Native Americans. Noticeably more pliable than cowhide, which makes it excellent for gloves and poor for anything that must hold a shape.
Hide — The skin of a large animal, before or after tanning. From the German haut, meaning skin. Smaller animals give skins rather than hides — the distinction is size, not species.
Leather Hide Parts — A hide is not uniform. The bend along the back is the firmest and most consistent; the belly is thin and stretchy; the shoulder falls in between and carries wrinkles. Where a piece was cut from predicts how it will behave.
Rawhide — Hide that has been cleaned of flesh and hair and dried without tanning. It is hard, translucent and rot-prone when wet — the untanned state that tanning exists to move past.
Whole Hide Leather — An entire tanned hide, uncut, including every region from bend to belly. Thickness, colour and firmness all vary across it, which is exactly why most hides are cut down before use.
Table Run — The grading of a batch as A, B, C or D according to how much of it is usable after damage and scarring are accounted for. A tannery's table run tells you the quality of the hides going in.
Trimming — Cutting away the parts of a hide that cannot be used — ragged outer edges, holes, badly damaged areas — before the usable area is measured.
Yield — The usable leather remaining once scars, holes and irregular edges are removed. Hides are irregular, so yield is the number that actually determines cost, not the size of the hide.
The Tannery
Chrome Tanning
Chrome tanning uses chromium(III) sulfate rather than plant tannins. It arrived in 1858 as an answer to how long and how expensive vegetable tanning is, and it won: something like ninety percent of the world's leather is now chrome tanned.
The reason is time. Thin skins tan in two or three hours and thick cattle hides in about a day, against months for a vegetable tannage. It is also far less labour-intensive and can be run largely automatically, which puts leather within reach of products that could never carry the cost otherwise.
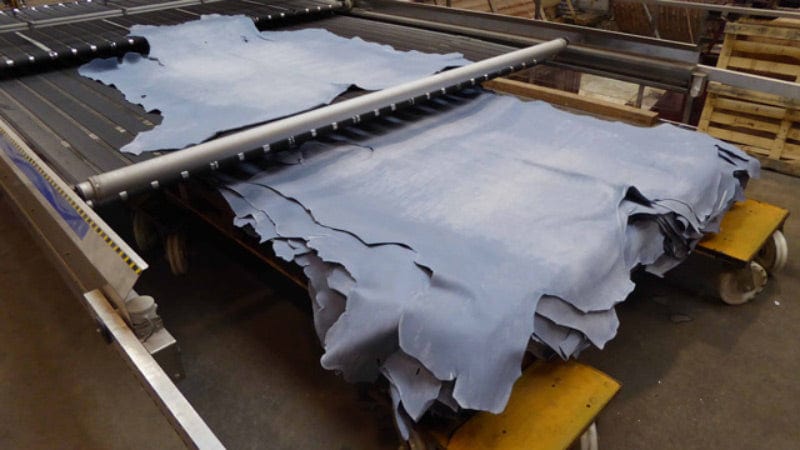
Hides come out of the drum a distinctive pale blue, which is why chrome-tanned stock at this stage is called wet blue. It gets dyed and finished afterwards, so the blue is never what you see in a finished product.
Chrome tanning has a reputation problem, some of it earned. The process uses metal salts and the effluent has to be handled properly, which is a question about a tannery's practices rather than about the chemistry itself. It is worth being precise about the material too: chrome-tanned leather is softer, more flexible, more water-resistant and more colour-stable than veg-tanned. Those are advantages, not compromises. What it will not do is hold a tooled impression or burnish the way a firm veg tan does. If you have ever wondered why almost every leather jacket, glove and car seat is chrome tanned while almost every tooled belt and holster is not, that is the reason — the two tannages are suited to different jobs, and the industry sorted itself accordingly a long time ago.
What we use: a chrome-tanned base is where the flexibility and resilience in our leather come from, before the vegetable re-tan goes on top of it. See the wallets.
Tanning

Tanning is the step that turns a hide into leather. Everything before it is preparation and everything after it is decoration.
The problem tanning solves is decay. A raw hide is protein, and protein rots — get an untanned hide wet and it will putrefy like any other piece of an animal. Tanning permanently alters the collagen structure so it can no longer break down, and what comes out the other side is a material that can get soaked, dried, folded and carried for decades without decomposing. That single chemical change is the whole basis of the trade.
Before the tanning agent ever touches the hide there is a sequence of unglamorous work in the beamhouse. Soaking removes the salt used to preserve the hide in transit, along with dirt and blood. Liming swells the fibre bundles and loosens the hair so it can be taken off. Bating then brings the hide back down and softens it, so the fibres will accept what comes next. Skip or rush any of these and no tannage will save the result.
Then the tannage itself, and here the trade splits into two families. Vegetable tanning uses tannins drawn from bark and leaves, takes months, and gives firm leather with body. Chrome tanning uses chromium salts, takes about a day, and gives softer, more flexible leather. Roughly ninety percent of the world's leather is chrome tanned, largely because of that difference in time.
Neither is straightforwardly better. They produce genuinely different materials, and a great many hides — including ours — see both.
Vegetable Tanning

Vegetable tanning uses tannin, a chemical that occurs naturally in the bark, leaves and branches of trees — mimosa, oak and chestnut are the usual sources. It is the oldest method there is, and it is still the slowest.
Hides go into pits or drums of tannin solution and stay there, moving through baths of increasing concentration, for weeks to months. The tannin works into the collagen gradually, and the pace is the point: rush it and the outside tans while the core does not. The plant matter also colours the leather as it goes, which is why veg-tanned hides arrive in beiges, tans, reds and deep browns rather than a neutral state waiting for dye.
What it produces is firm leather with body. It holds a shape, takes tooling and stamping, and burnishes at the edges. It is also the leather that develops patina fastest, because with no heavy finish sealing it, body oils and daylight reach the fibres directly.
The costs are real. Months of tannery time is expensive, veg-tanned leather is stiffer at the start and needs breaking in, and it marks easily while it is young. It also reacts to water in a way chrome-tanned leather does not — a few drops on a new veg-tan wallet will leave spots that take weeks to blend back in.
What we use: a combination tannage — a chrome-tanned base for flexibility and resilience, followed by a high vegetable re-tan using 25% vegetable extracts. So it is not a pure vegetable tan, and anyone telling you their leather is simply "veg tanned" is describing one of two very different processes. See the wallets.
Synthetic Tanning — Tanning with synthetic agents such as phenols and formaldehyde resins. Almost never used alone — it appears as one stage of a combination tannage alongside chrome or vegetable.
Tawing — One of the oldest methods there is, using alum and aluminium salts with binders such as flour and egg yolk. It produces very pale, soft leather, and unlike true tanning it is reversible in water.
Alum Leather — Leather produced by tawing with aluminium salts, usually potassium or sodium aluminium sulfate. Distinctively white, and historically prized for gloves.
Blue Split Leather — The flesh-side split taken off during chrome tanning, still blue and unfinished. Low grade, since it carries none of the grain layer's strength.
Chrome Tanned Leather — Leather produced by chrome tanning. Softer, more supple and more water-resistant than a vegetable tannage, and vastly quicker to produce.
Crust Leather — Hide that is tanned and dried but not yet dyed or finished, sitting in its natural colour. The intermediate stock a tannery holds before committing it to a colour.
Re-Tanned Leather — Leather tanned a second time to add properties the first tannage did not give it. Our own leather is re-tanned — a chrome base with a vegetable re-tan over it.
Vegetable Tanned Leather — Leather made by vegetable tanning. Firm, full-bodied, tools and burnishes well, and develops patina faster than anything else.
Wet Blue Leather — Chrome-tanned hide that has not yet been dyed or dried, named for the pale blue the chromium salts leave behind. It is traded in this state worldwide.
Bating — Treating the limed hide with enzymes to bring it back down, soften it and restore flexibility before tanning. Skip it and the leather stays harsh.
Blues In The Leather — Describes hides in the blue state after chrome tanning, and also a blue cast that can appear in finished leather. Context decides which meaning is intended.
Chromium Salts — The mineral tannins used in chrome tanning. They stabilise the hide by cross-linking its collagen fibres. Somewhere around 85–90% of the world's leather is tanned this way.
Curing — The first step in the whole process: stopping the skin from rotting, usually by salting, within hours of slaughter. Decomposition begins within about five hours, so nothing else matters if this is missed.
Drum Dyeing — Colouring leather by tumbling it in a rotating drum full of dye solution, so the colour penetrates rather than sitting on the surface. The reason aniline colour has depth.
Liming — Soaking hides in an alkaline lime solution to swell the fibre bundles and loosen the hair so it can be removed. It also opens the structure up so the tanning agent can get in.
The Grades
Bonded Leather

Bonded leather is the bottom of the scale. It can contain as little as twenty percent real leather, and sometimes less.
It is made from shredded fibres and offcuts — the scraps left over from cutting real hides, which would otherwise be waste. Those get mixed with plastic, usually latex or polyethylene, spread onto a cloth or paper backing, and rolled out into a sheet. The sheet is then embossed with a grain pattern and sprayed or printed to whatever colour and texture the buyer asked for. The result looks like leather in a photograph and behaves like plastic in your hands.
The plastic is what dooms it. It has no give, so it cannot flex where a product flexes. Within months of ordinary use it starts to crack along the fold lines, and once the surface cracks, the coating lifts away from its backing in flakes. That is what the photograph above shows: not wear, not patina, but a material coming apart into pieces.
You will find it on inexpensive furniture, book covers, folios and desk accessories, usually described with words that avoid the question — "leather-look", "leather composite", "reconstituted". Anything sold as bonded leather has already told you what it is, if you know that bonded means glued.
A real hide fails gradually and often gracefully; a bonded sheet fails suddenly and completely, because there was never a continuous piece of leather holding it together.
What we avoid: offcuts and adhesive pressed onto a backing. It delaminates, which is why we have never made anything from it. See what we do make.
Corrected Grain Leather

Corrected grain is hide that has been sanded or buffed to remove visible scratches, scarring and blemishes, then finished to look uniform. It is cut from the same topmost layer as full-grain, so the fibre structure underneath is just as strong — what changes is the surface.
"Corrected" covers an enormous range, and that is the part worth understanding. At one end it means a light pass to knock back a few marks. At the other it means the entire grain layer is buffed off and an artificial one is embossed in its place under heat and pressure. Both get sold under the same two words. As a rule, the less correcting that has happened, the better the leather.
You will meet a few named variants. Embossed corrected grain carries a print stamped over the top — the alligator and snake patterns on inexpensive goods are almost always this. Smooth corrected grain is buffed toward a glass-like finish and turns up on formal shoes. Lightly corrected leathers sit closest to full-grain: enough of the original grain survives that they still age and darken, even when pigment has been added.
The practical test is not whether leather has been corrected but how much, and nobody selling it will volunteer the answer. Look at the surface across a whole panel. Natural grain varies from one square inch to the next. A corrected surface repeats.
What we avoid: sanding the grain off and embossing a replacement. Our belts are cut from leather that is never sanded or bonded, so what you see is the hide's own surface. See the belts.
Full Grain Leather

Full-grain is the highest grade of leather there is. It comes from the topmost surface of the hide with no alteration to the grain — nothing sanded off, nothing buffed away, nothing embossed on top.
That means it keeps the marks the animal collected while it was alive: scarring, scratches, stretch marks, insect bites. People new to leather read those as defects. They are the opposite. They are the evidence the surface is original, and their absence usually means the grain has been sanded away and replaced with something printed. If every inch of a hide looks identical, ask why.
It is also the strongest part of the hide. The fibres at the top are the densest and most tightly packed, which is why full-grain outlasts every grade beneath it, why it develops patina instead of flaking, and why it stays breathable rather than trapping moisture against itself.
There is real variation within the grade. Undyed vegetable-tanned tooling leather has no protective finish at all, which makes it unforgiving to work with and to own — but it drinks up body oils and darkens faster than anything else. Tumbled full-grain sits at the other end: softer in the hand from the start, with the grain texture pulled out by the drum rather than pressed in by a plate.
The grade below it, corrected grain, starts from the same layer of the same hide. The difference is entirely what gets done to the surface afterwards.
What we use: 9oz Seidel full-grain, never sanded or bonded — the strongest, densest layer of the hide. See the belts.
Split Grain Leather

A hide is too thick to use as it comes off the animal, so it gets split into layers. The top layer carries the grain. The layer underneath it — the one that was closest to the flesh — is split grain.
It has no grain of its own, because the grain was on the piece that got taken off the top. What it has instead is a loose, fibrous structure with none of the density that makes the top layer strong. To sell it as leather, it is sanded, coated, embossed with a printed grain pattern, and dyed to a flat uniform colour.
This is the single most useful thing in this glossary: "genuine leather" is usually split grain. The phrase sounds like a guarantee and functions as the opposite. It certifies only that some part of an animal was involved. Split grain, finished split and genuine leather all describe roughly the same material.
It gives itself away once you know the signs. The surface feels like plastic rather than skin. It does not breathe. The colour is perfectly even, with none of the depth or variation you get when dye soaks into a real grain. There is a distinctive chemical smell. And instead of developing patina, the coating eventually cracks and lifts, because the coating is the only thing holding the appearance together.
It is not that split leather has no use — it becomes suede perfectly well, where the loose fibre structure is the point. The problem is split grain dressed up as something it is not.
What we avoid: the lower split. A belt takes its strength from the dense fibres at the top of the hide, and those are exactly what splitting removes. See the belts.
Altered Leather — Any leather whose original surface has been physically or chemically changed — sanded, embossed, coated. The umbrella term covering most of what sits below full-grain.
Degrained Leather — Leather with the grain layer removed entirely by abrasion, splitting or sanding, leaving a smooth uniform surface with none of the original strength or character.
Enhanced Grain — An artificial grain embossed onto leather to make it look more appealing than the hide it came from. Enhanced means replaced.
Grained Leather — Leather whose natural grain has been buffed or sanded to even out irregularities. Confusingly named — grained leather has had grain taken away, not added.
Shrunken Grain Leather — Leather chrome-tanned in a way that deliberately shrinks the grain layer, tightening it into a distinctive pebbled pattern. Genuinely produced in the hide rather than stamped on.
Drawn Grain — A finishing technique that draws out and reshapes the grain to produce a chosen appearance. Another route to a surface that looks more regular than nature managed.
Grain (Character) — How a particular hide's grain looks — its pattern, texture and irregularity. Much like wood grain, it varies by animal, breed, age and region of the body, and never repeats.
Grain (Leather) — The outermost layer of the hide, carrying its natural markings — scars, scratches, insect bites, fat wrinkles. It is the strongest part and the source of everything leather is valued for.
Natural Grain — Grain left as it grew, with no sanding, buffing or embossing. It is never uniform, and that lack of uniformity is the point: a repeating pattern means a plate pressed it.
The Finish
Aniline Leather

Aniline refers to how leather is coloured, not how it is tanned. The dye is transparent and water-soluble, and it goes into a drum with the hides so that it soaks all the way through the leather rather than sitting on top of it.
Because nothing opaque is added afterwards, the grain stays completely visible — pores, marks, the lot. Different parts of a hide absorb dye at different rates, which is why an aniline finish produces shade variation across a single piece and why no two panels come out identical. That variation is the finish working, not a fault in it.
The trade-off is protection. With no pigment layer and no heavy topcoat, aniline leather takes on water marks and darkens where it is handled. Most people who like it like it for exactly that reason: it records use. If you want a surface that looks the same in five years as it does today, this is the wrong finish, and semi-aniline is the compromise built for that.
The word gets used loosely in furniture showrooms, where "aniline" sometimes means "expensive-looking" rather than anything specific. The test is whether you can see the pores and whether the colour varies. A perfectly even surface with invisible pores has been pigmented, whatever the label says. Only the best hides can take an aniline finish at all, which is the real reason it costs more — there is nothing on top to hide a flaw, so any hide with flaws gets sent down the line to a heavier finish instead.
What we use: an aniline finish, which preserves the natural grain — so the marks in the hide stay visible and the leather darkens as you carry it. See the wallets.
Nubuck Leather

Nubuck is leather whose grain side has been lightly sanded to raise a short, fine nap. The result is velvety to the touch and catches light in a way smooth leather does not — brush it one way and it goes darker, brush it back and it lifts.
The important detail is which side gets sanded. Nubuck is buffed on the outside, the grain side, so it is still made from the strong top layer of the hide. Suede is buffed on the flesh side, usually from the weaker split underneath. They look similar in a photograph and are not remotely the same material — nubuck is considerably more durable, and priced accordingly.
Because the sealed surface has been abraded away, nubuck absorbs almost anything it meets. Water spots it. Oils from your hands darken it. Many nubucks are treated with wax or oil during finishing partly to manage this, which is where the name oil nubuck comes from.
The name itself appears to be a contraction. Deer hides were once called buckskin; the theory is that "new buckskin" collapsed into "nubuck" and stuck, even though the leather is now almost always made from cattle hide rather than deer.
Care is simple but non-negotiable: a soft brush to lift the nap, no saddle soap, no conditioner meant for smooth leather. Anything that wets or oils the surface heavily will flatten the nap permanently.
Worth knowing before you buy: nubuck does not stay velvety. The nap wears smooth at every point of contact, so a boot toe or a bag corner will go glossy while the panels around it stay matte. Some people find that handsome and some find it scruffy, but it is not a defect and it cannot be brushed back out.
Pigmented Leather

Pigmented leather takes its name from the layer of coloured pigment applied to the surface as a finish. Unlike an aniline dye, which soaks in and stays transparent, pigment is resin-based, opaque, and sits on top.
That layer does real work. It masks blemishes, so hides that would otherwise be downgraded become usable. It makes colour perfectly consistent from panel to panel, which matters enormously if you are upholstering a three-piece suite and cannot have one cushion darker than the next. And it resists stains, scratches and UV fading better than any other finish.
What it costs you is everything underneath. The pigment hides the natural colour and covers the pores, which reduces breathability and takes away the soft, yielding feel of an unfinished surface. It is stiffer, and it does not darken with handling, because handling never reaches the leather.
There is nothing dishonest about pigmented leather in itself — it is the right choice for a car seat or a family sofa. The dishonesty comes when a heavy pigment coat is used to disguise a corrected or split surface, and the product is then sold on the strength of the word "leather" alone. The finish is doing double duty: protecting the material and concealing what the material is. A useful habit when you are shopping: press a thumbnail gently into an inconspicuous corner. A heavy pigment coat resists and springs back like plastic. Leather with little or nothing on top gives, and the mark it takes fades on its own within a minute or two.
What we avoid: an opaque pigment layer over the grain. Ours is aniline finished, so the natural grain still shows through. See the wallets.
Semi-Aniline Leather

Semi-aniline is aniline-dyed leather with a thin protective coat added on top. It exists to solve the one real complaint about aniline: that it marks easily.
The dye still soaks through, so the colour still has depth and the hide's own character still shows. The difference is a light finish laid over it — enough to resist stains and scratches, not enough to bury the surface. The giveaway is the pores. On semi-aniline you can still see them, which means the leather still breathes. On pigmented leather you cannot, because the coating is opaque and continuous.
It is usually applied to full-grain and other hides with an even, unblemished surface, since a light finish has no capacity to hide anything. A heavily marked hide would need a heavier coat, and at that point you are making pigmented leather instead.
Think of the three finishes as a single sliding scale rather than three categories. Aniline shows everything and protects nothing. Pigmented protects everything and shows nothing. Semi-aniline sits deliberately in between, and for a lot of furniture and footwear it is the sensible answer — the leather still ages, just more slowly and more predictably.
Where it disappoints is patina. The coat that protects the surface also slows how quickly oils reach the leather, so the change over years is gentler. That is a feature if you want consistency and a drawback if the whole reason you bought leather was to watch it change. It is also the finish most often misdescribed at the point of sale, because "semi-aniline" sounds like a downgrade from "aniline" and sells less well than either neighbour — so plenty of semi-aniline leather is simply advertised as aniline and left at that.
Suede Finish

A suede finish is produced by buffing the flesh side of a tanned hide until an even, short nap is raised. It is the inside of the skin, brought to the outside deliberately.
That is the whole difference between suede and nubuck, and it is worth fixing in your head because the two get confused constantly. Nubuck is sanded on the grain side and keeps the strength of the top layer. Suede is sanded on the flesh side and is very often made from the split — which, for once, is exactly the right use for split leather. The loose fibre structure that makes a split useless as a smooth surface is precisely what produces a good nap.
Quality comes down to the animal and the layer. Lambskin gives the softest, lightest suede, which is why it dominates garments. Calfskin gives a finer, denser nap than hide from an older animal. Older and thicker hides produce a coarser result that works better for footwear than for clothing.
Suede has no protective finish at all, which is the source of every complaint about it. It stains readily, absorbs water, and flattens where it is rubbed. A brush restores the nap; almost everything else — heat, oil, saddle soap — destroys it.
Treat it as a surface that will show its life. That is either the appeal or the reason to choose something else.
One more piece of vocabulary worth having, because it is used to blur exactly this distinction: "split suede" and "genuine leather suede" both mean suede made from the lower split. That is fine and normal for suede. It only becomes a problem when the same phrase is used to imply the product is made from the top of the hide.
Antique Leather — Leather finished to look older than it is, either by applying a light coat over a dark base or by rubbing a darker glaze into the recesses. A manufactured version of patina.
Brushed Leather — Leather sanded or brushed on the grain side to raise the fibres into a fine velvety nap — the same operation that produces nubuck, at varying depths.
Embossed Leather — Leather stamped under heat and pressure with a pattern — often imitating alligator, snake or ostrich. Usually applied to corrected hide, since a sanded surface takes a stamp cleanly.
Glazed Leather — Leather burnished under pressure with a glass or steel roller until it shines. One of the oldest finishes, and the shine comes from compression rather than a coating.
Leather Finish — Whatever is done to the surface after tanning to change how it looks, feels or wears — dye, coating, polish, texture. The finish is where most of what you notice about leather is decided.
Matte Finish — A flat finish with little or no shine, close to leather's natural state. Tends to feel softer in the hand than a glossy coat.
Patent Finish — A high-gloss, mirror-like finish built from several coats of resin, lacquer or plastic over the leather.
Patent Leather — Leather with a patent finish. Invented by Seth Boyden in Newark in 1818, and still the standard for formal shoes. The coating is waterproof and cracks if flexed hard.
Buffed Leather — Leather with the top grain sanded off before embossing or pigmenting. The sanding is what makes the embossing possible, and what removes the strength.
Naked Leather — Leather with no finish or treatment masking its natural state after tanning, so the oils settle into the hide itself. Shows every mark, which is the intention.
Pearlized Leather — Aniline leather sprayed with a liquid metallic topcoat for a soft pearl sheen. Decorative, and the topcoat is the first thing to wear off.
Perforated Leather — Leather punched with holes at regular or irregular intervals, for ventilation or decoration. Common in car interiors and driving gloves, and it weakens the panel.
Unfinished Leather — Leather that has been dyed but given no protective coating. More open and breathable than finished leather, and correspondingly easier to stain.
Unprotected Leather — Leather without a protective topcoat — softer, more pliable and more breathable than protected leather, and far quicker to show wear.
Aniline Dye — A transparent, soluble dye, originally a coal tar by-product, that colours leather without concealing it. The dye behind aniline leather.
Base Coat — The first coat applied during finishing. It determines how every subsequent layer sits, which makes it the least visible and most consequential step in the finish.
Boarding — Folding leather grain-to-grain and working it repeatedly to soften the hide and pull the grain into a fine creased pattern. Mechanical, and it emphasises grain that is genuinely there.
Hand Rubbing — Working the surface by hand with a brush, sponge or cloth to bring up a particular look and feel. Slow, and it cannot be automated, which is why it appears mostly on expensive goods.
Milling — Tumbling dry leather in a drum to soften it and raise a pebbled texture. Without it, leather dries firm as the fibres bind together.
Skive — To thin leather, usually at the edges, so pieces can be folded or joined without bulk. The difference between a wallet that closes properly and one that gapes.
The Fakes
Imitation Leather

Imitation leather is the umbrella term for materials engineered to look like leather without being it: a textile base concealed under two or more layers of synthetic polymer, with a leather-like grain embossed into the top.
It exists because hides are finite, slow to produce and expensive, and demand for the look of leather far exceeds the supply of the material. Every few years another version arrives with a better story attached — PU, pleather, leatherette, and more recently the plant-based ones built on pineapple leaf, apple pomace, cactus or mushroom. The marketing differs enormously. The construction rarely does: a fibre or plant base, bound and coated with polymer, embossed to imitate grain.
What it reproduces is the appearance. What it does not reproduce is the set of properties that made leather worth imitating — breathability, moisture permeability, and the particular pliability that comes from a fibre structure grown rather than manufactured.
The embossing is the giveaway, and it is easy to check once you know. A grain pattern pressed by a plate repeats, because the plate repeats. Look across a large panel: if the same arrangement of pores and creases appears more than once, it was stamped. Real grain never repeats, because no two square inches of an animal are identical.
None of this makes imitation leather illegitimate. It is cheaper, uniform, waterproof, and it is the honest choice for someone avoiding animal products. The objection is to the vocabulary — to a material being sold on leather's reputation for lasting decades when its own coating will fail in a few years.
What we avoid: a grain pattern machine-embossed to imitate one the hide never had. See what we do make.
PU Leather

PU leather is polyurethane — a polymer plastic — made to look like leather. The usual construction is a polyester fabric base laminated with a polyurethane coating embossed to resemble top-grain.
There is a complication worth knowing, because it is where most of the confusion around this term comes from. PU leather can also be built on a real leather base: take the split left over after the top grain is removed, laminate polyurethane onto it, and emboss a grain into the plastic. That version is called bicast or semi-synthetic leather, and it is sold using the word "leather" with a straight face — because technically some leather is in there, underneath a plastic skin that is doing all the visible work.
Either way the behaviour is the same. It has roughly the texture of leather and is lighter, but it tears more easily and has a short life. The polyurethane layer is continuous and inflexible in a way a hide is not, so it fatigues wherever the product bends. First it dulls, then it cracks along the fold, then the coating peels away from the backing.
It will not develop patina. Nothing can soak into a plastic surface, so instead of getting darker and richer where you handle it, the spot you handle most is simply the spot that fails first.
The tell in a product description is the absence of a hide. "PU leather", "vegan leather", "leatherette" and "man-made materials" all describe the same family. Where the material really is a hide, sellers say so in specific terms — a grade, a weight, sometimes a tannery.
What we avoid: a polyurethane coating on a fabric backing. It cracks and peels rather than ageing. See what we do make.
Pleather

Pleather is a contraction of plastic leather, and unusually for this glossary the slang term is the honest one. It is plastic — PVC or polyurethane — bonded to a fabric backing.
The two versions behave differently enough to be worth separating. PVC pleather does not breathe at all and is difficult to clean, which is why it tends to be kept away from anything worn against skin: watch straps, collars, leashes. Polyurethane pleather is softer, more flexible, marginally breathable, and can be dry cleaned, so it is the version you meet in clothing and upholstery.
Neither ages. This is the part that matters, and it is the same story as PU, imitation leather and bonded: because the surface is a coating rather than the material itself, wear does not develop it, wear removes it. What starts as a scuff becomes a split, and the split spreads along the fold lines until the coating lifts away from its backing in sheets. There is no equivalent of patina because there is nothing for oils to soak into.
It has legitimate uses — it is cheap, waterproof, uniform, and it is a genuine option if you do not want an animal product. What it is not is a durable substitute. Judged on lifespan rather than appearance on the day of purchase, it loses to almost any real hide.
What we avoid: plastic leather. Same failure mode as PU — the coating splits away from its backing. See what we do make.
Laminated Leather — Leather with a layer of plastic or metallic foil bonded to the surface for gloss or effect. The lamination is what wears, and when it lifts the leather beneath is exposed unevenly.
How It Ages
Break

Break describes what the surface does when you fold leather back against itself. Crease a piece grain-side-in and watch the wrinkles that form — their size and number is the leather's break, and it is one of the fastest quality tests available to anyone holding a product in a shop.
It happens because a hide is not one uniform material. The grain layer on top is denser and firmer than the looser fibres beneath it, and the two layers have different elasticity. When you fold the piece, the top grain cannot compress at the same rate as what is under it, so it is pushed outward and has to go somewhere. Where it goes is into wrinkles.
A fine break gives many small, tight, even wrinkles across the fold. That indicates a dense, tightly organised grain — good leather. A coarse break gives a few large, deep ridges, which means loose fibres underneath and a weaker structure. If the surface cracks or the coating lifts instead of wrinkling, you are not looking at a fold in leather at all; you are watching a finish delaminate from its backing, which is the failure mode of heavily corrected and bonded materials.
The test costs nothing and is hard to fake, because break comes from fibre structure rather than from anything applied at the end. Pick up a wallet, fold a corner gently, and look closely at the crease. Fine and even is what you want.
One caveat before you go squeezing things in shops: break is a property of the leather, not a defect, and every hide has one. You are comparing how fine the wrinkles are between two pieces, not looking for leather that does not wrinkle at all. Anything that stays perfectly smooth when folded has a coating stiff enough to override the leather underneath, which is the opposite of the signal you want.
Hand

Hand is the trade's word for how leather feels — smooth or coarse, soft or stiff, dead or lively. A leather with a good hand feels supple and yielding when you pick it up. It is an unapologetically subjective measure, and it is still one of the first things anyone who works with hides checks.
Three things largely determine it.
Thickness. Thin hides are more pliable and softer in the hand; thick ones are stiffer. This is why a garment leather and a belt leather feel like different substances even when they came off the same animal — see weight and thickness.
Finish. A heavy, glossy coating stiffens leather and puts a layer between your fingers and the material. A matte or light finish leaves it softer and more responsive. This is the fastest way to change hand, and consequently the most common way it gets faked — a softening agent sprayed on late in finishing gives a pleasant hand in the shop that does not survive much use.
Tannage. Chrome-tanned leather starts softer and more flexible. Vegetable-tanned leather starts firm with real body, and softens over months of being carried rather than arriving that way.
Related terms sharpen it further. Full hand describes leather with substance and body rather than limpness. Boardy is the opposite of a good hand — stiff, unyielding, closer to card than to skin.
Worth remembering when shopping: a soft hand on day one is not the same as a good hide. Firm leather that softens with use will usually outlast leather that arrived soft because something was sprayed onto it.
Patina

Patina is the sheen and character that builds on the surface of real leather over years of being carried, handled and left in daylight. It is the one property that separates leather from every material invented to replace it.
The mechanism is unglamorous. Your hands deposit oils every time you touch the leather, and those oils sink into the fibres. Dirt goes with them. Sunlight tans the surface much as it tans skin. All of this accumulates fastest exactly where you touch most — the corner you pull a wallet out by, the fold where a belt bends, the spot your thumb lands. So the pattern that emerges is a record of how you specifically used the thing, which is why no two develop the same way.
Not all leather can do it. Patina needs the oils to reach the fibres, so it requires a surface that is open — full-grain with an aniline or light finish. A heavy pigment coat blocks it, and bonded or PU materials have nothing to patinate — their surface is plastic, and plastic does not age, it degrades.
That is the distinction worth carrying out of this glossary. Real leather gets better in a way that cannot be faked at the factory, because it takes years of a specific person's use to produce. Synthetic materials do the opposite on the same timeline: they crack, peel and lift.
You cannot rush it, and attempts to force it with oils and heat generally produce a blotchy, over-darkened surface rather than the real thing. Carry it and wait.
Full Hand — Leather with real substance and body in the hand — soft and supple without feeling thin or limp. What most people are reaching for when they say leather feels expensive.
Boardy — Stiff, inflexible leather with no give. Sometimes inherent to the hide, more often the result of drying out, poor storage or water damage. The opposite of a good hand.
Breathability — Leather's ability to absorb moisture and release it as vapour, which is why a leather shoe stays comfortable and a plastic one does not. Heavy pigment coats reduce it; synthetics never had it.
Fat Wrinkles — Natural creases in the grain, left where fat was deposited under the animal's skin or where the skin stretched and contracted. A marking that only appears on real, unsanded hide.

Written by Ryan Popoff
Ryan Popoff is the creative mind behind Popov Leather wallets, iPhone cases, belts, watch bands and journals since 2013. With a Bachelor Degree in Fine Arts, my leatherworking journey began at home. I wanted to create a simple leather wallet that could fit into my front pocket and, to my delight, it was a hit with family and friends. Hopefully you love our honest, quality leather goods too!


