


How to Make a Leather Axe Sheath
Axes are indispensable tools for outdoor enthusiasts, providing essential functions from chopping firewood to clearing trails. But like all tools, an axe requires proper protection - and that's where a durable, high-quality leather axe sheath comes into play. In this comprehensive tutorial, we will walk you through the process of creating your very own DIY leather axe sheath. This project is enjoyable and rewarding for seasoned leathercrafters and beginners alike.
Download the Free PDF Pattern
The first move in crafting your DIY leather axe sheath is to download our free pattern. This pattern has been meticulously crafted to ensure it can be adjusted to fit the unique size and shape of your axe, serving as an essential guide throughout your leather crafting journey.
Materials Needed
To set sail on this DIY leather axe sheath project, you'll need specific materials and tools:
- Quality 8/9oz leather
- Sharp utility knife and/or Leather Shears
- Metal Line Snaps & Rivets
- Glue, Paper, Scissors & Cardboard for the template
- Axe
Always remember, the quality of your materials and tools will significantly influence the final aesthetics and durability of your axe sheath.
Transferring the Pattern and Cutting the Leather
Once you've understood the pattern, it's time to adapt it to your axe's specific dimensions and transfer it onto your leather piece. Using a sharp utility knife is crucial for clean, precise cuts. Your attention to detail at this stage will substantially shape the final outcome of your leatherworking project.
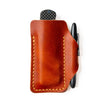
Assembling the Axe Sheath
With all the pieces accurately cut, you can now start the assembly of your leather axe sheath. Begin by aligning and rivetting the pieces together using the metal rivets and setter.
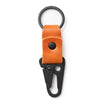
Creating the Strap and Snap
To keep your axe securely in its sheath, you'll need to add a strap and snap. Cut a strip of leather, secure one end to the back of the sheath, and attach a snap or button to the other end. Ensure the strap is long enough to reach the snap when the axe is in the sheath.
Final Touches
With your axe sheath assembled and formed, it's time for the finishing touches. Consider treating the leather with a conditioner or sealant to protect it from moisture and wear. You may also want to add personal details, like your initials or a small logo, for a unique touch. The end product should be a robust, functional, and aesthetically pleasing leather axe sheath that you'll be proud to carry on your outdoor adventures.
Creating a DIY leather axe sheath is a fun and rewarding project. Not only does it result in a practical tool protector, but it also gives you a sense of accomplishment and an opportunity to express your creativity. With quality materials, a good pattern, and a bit of patience, you can craft a unique leather accessory that stands the test of time.
Written by Ryan Popoff
Ryan Popoff is the creative mind behind Popov Leather wallets, iPhone cases, belts, watch bands and journals since 2013. With a Bachelor Degree in Fine Arts, my leatherworking journey began at home. I wanted to create a simple leather wallet that could fit into my front pocket and — to my delight — it was a hit with family and friends. Hopefully you love our honest, quality leather goods too! Reach out with questions.


Leave a comment
All comments are moderated before being published.
This site is protected by reCAPTCHA and the Google Privacy Policy and Terms of Service apply.